Arriving to Croatia's island Vis in spring was a visual and aromatic delight. I took a journey around the island's meadows and back paths to pick bunches of aromatic sage, oregano and rosemary , wild herbs rich in essential oils wonderfully accompanying lamb. With the help of my newfound fragrant friends , I made two of my favourite go to, easy to make, healthy and nutritious dishes - a roast lamb with spring vegetables and a hearty herbed lamb soup.
SPRING LAMB WITH WILD HERBS
A perennial favourite, with a new, easy twist
serves 2:
INGREDIENTS :
METHOD:
HEARTY LAMB SOUP
This dish can be started the day before eating, just make sure you boil the meat and bones for at least 3-4 hours, if not overnight. Once the broth is done , it can keep in the fridge for up to 3 days. Adding the rest of the veggies in half an hour before serving, makes this into an easy and quick assembling hot meal
INGREDIENTS:
METHOD:
Bon appetit! x
This summer was the first one that I owned an actual bbq yet had no man to helm it. Usually, the whole shebang goes something like this: I spend hours preparing the food while the guy drinks beer, then once I'm done, he fires up the bbq puts everything on there and gee whizz, a short time later, it is he who has cooked the meal and is the hero of the party. But is this bbq business really as hard as it looks? I put it to the test when I started cooking everything on my little Webber out on the deck this summer out of sheer avoidance of having a messy kitchen and having to clean the stovetop ( I know some people find it pleasurable, but gimme a vacuum job over a stovetop any day).
Dear readers, I know this will blow your mind but lo and behold, bbq-ing is not something only a male brain can understand! It is actually a really easy and versatile way of cooking that can be more foolproof than you think.
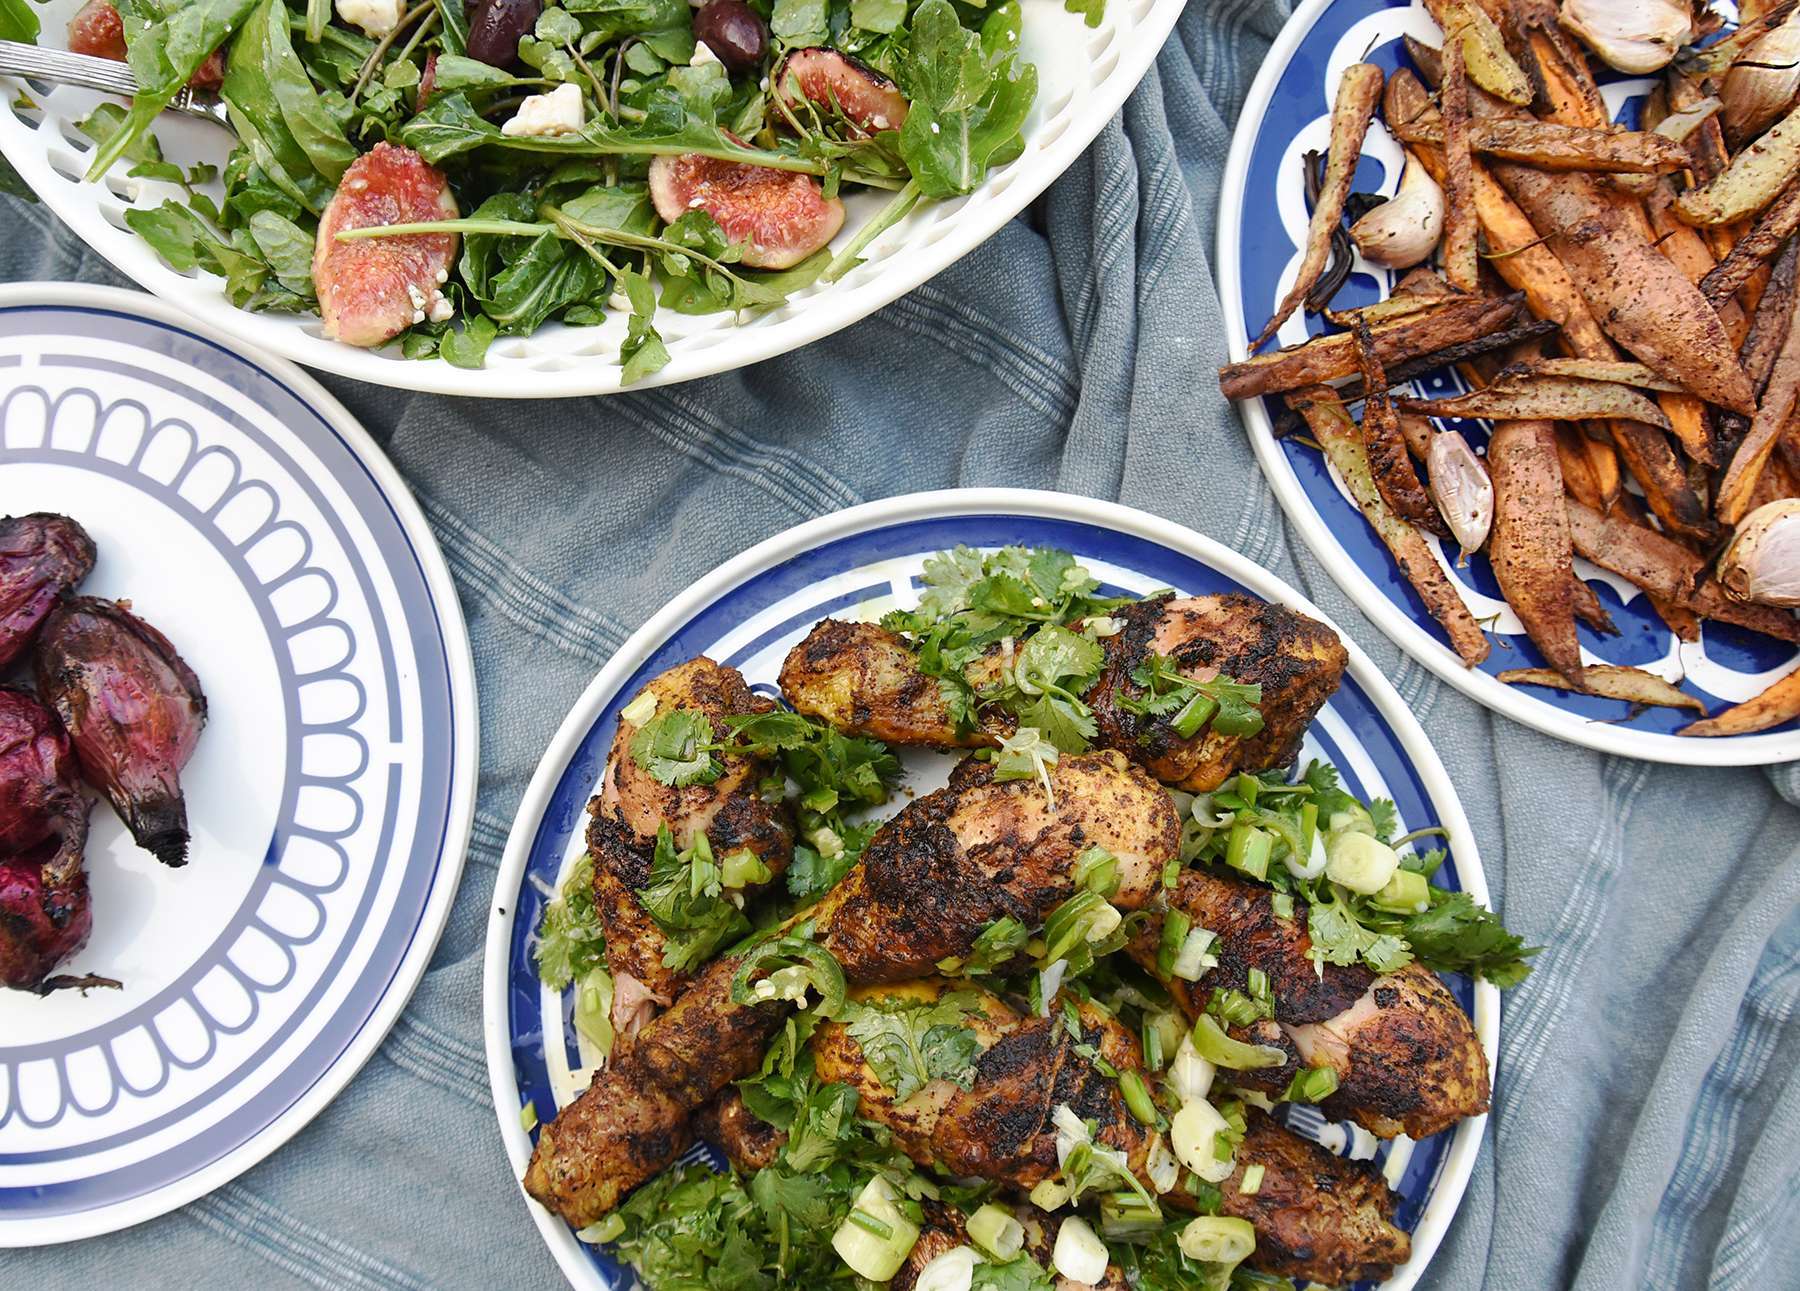
In my experimentations with the best bbq chicken recipes , I made up this drumstick recipe. I have a really good wings recipe involving molasses that is beyond delicious, but did you know that many people still don't like to think that their meat was once an animal with many bones? I needed to get a protein with less bones to appease my guests so this technique was born and it quickly became a favourite , not only for the flavour explosion but also the ease of putting it together in a hurry.
I made this for dinner last night and this picture was taken quickly as people were salivating around me. I am a terrible food stylist but I am an excellent hand swatter, and trust me, you will have to be one as well if you make this- it is that delicious that I recommend you get more chicken than what you think people will want to eat - I never have any chicken leftover and even the vegetarian friends sometimes get tempted into a bite ( can they still call themselves a vegetarian , idk, but I'm flattered either way)
This recipe is paleo, gluten, dairy and sugar free. Serves 2-3 people depending on your hunger levels
INGREDIENTS
for the dry rub
- 6 organic chicken drumsticks
- 2 -3 tablespoons of sumac ( a dried berry spice)
- 1-2 level tablespoon of turmeric
- 1 teaspoon of cayenne pepper (do change this for taste)
- good oil such as olive oil, tasteless coconut oil, grapeseed oil or expeller pressed sunflower oil
- salt and pepper
for the wet sauce
- 2 jalapeño peppers chopped
- half a bunch of garlic chives chopped
- 4 spring onions or scallions chopped
- juice of 2-3 limes
- a bunch of coriander/cilantro chopped
- olive oil + salt and pepper
METHOD
In a large bowl, mix the chicken drumsticks with the spices, a good glug of oil and salt and pepper, making sure that the drumsticks are evenly coated with spices. You can do this ahead of time and keep in the fridge overnight for extra flavour, but I find that immediately before cooking is still yummy. Turn the bbq to high, then 5 minutes later, turn the bbq to medium low. Place the chicken on the bbq- it should be hot enough that you hear sizzling. I have found that 10 minutes on one side is a good amount of time to get lightly charcoaled and cooked through. I ended up doing 10 minutes on the skin side with the lid down, then 10 minutes on the other side with the lid down, and then I will do 3-5 minutes on the narrow curves that miss out right at the end with the lid open. This guarantees that the chicken is cooked through properly yet is still juicy. My chicken drumsticks are pretty small - if you have bigger ones and are unsure if the meat is cooked through, I recommend slicing open one of the legs to make sure. Nothing worse than still raw in the middle chicken served!
Whilst the legs are grilling, place all the wet sauce ingredients in a small bowl and mix through. Once the chicken is plated, pour the wet sauce all over it. Voila!
I served this meal with quick sides. Small onions were dipped into olive oil and then thrown on the bbq, and were turned whenever the chicken was. I also made a salad of watercress, rocket, kalamata olives, goat's blue cheese and figs with a balsamic dressing for some healthy greens. I know everyone is so against carbs these days but I'm a total fan so I made some potato and sweet potato chips in the oven as they take just as long as the chicken to cook. I sliced the potato quite thin and added olive oil, sumac, salt, pepper, rosemary, thyme and whole garlic. I then sliced the sweet potato in double the thickness (because it takes less time to cook ) and mixed it with cinnamon, sumac, salt and pepper and of course oil , then added it to the same pan as the other chips. Fan grill on 200-220C and half an hour later you have chips that even the carb avoiders cannot deny.
Happy weekending!
PS: the beautiful plates are from In The Roundhouse

Confession: I use the gluten free sour cream shortcrust Careme pastry most of the time guys , I won’t lie ( *not sponsored but now that you know Careme call me ok ; ) * ) but if you have the time to make from scratch , I have really liked making my own variation with sour cream dough based on the excellent ones on this website.
INGREDIENTS
1 1/2 - 2 packets of frozen sour cherries (800-1000grams depending on the depth of your dish)
About 1/2-1 bottle maple syrup ( or to taste )
Cornstarch, about 3 tablespoons
A good dash of Vanilla essence or the inside of 1 1/2 vanilla beans
Optional extras I personally like to add (not necessary) :
a couple of eggs
a couple of large dollops of cream
a dash of Kirsch
some sliced apple for decorating
You could also experiment with a touch less cornstarch and some pasture raised gelatine powder instead for a more jelly texture or almond flour for frangipane texture.
METHOD
Pour frozen cherries into a pot and heat up until they thaw. Pour just over half of the liquid out when the cherries just come to boil, leaving some juice for sauce. Add the maple syrup, vanilla, Kirsch, mix and simmer for 10 minutes. Add cornstarch and mix with a wooden spoon or spatula until the liquid has thickened significantly into a cohesive mass on a low simmer (about 5 minutes). The basis of the filling is done but I like to wait for the filling to cool and then add 2 beaten eggs (take 1/2 spoon cornstarch off) or 2 egg yolks and cream and mix that through before pouring into the shell for a richer, more indulgent taste.
I am so lazy with this I do not roll out the pastry dear reader. If I had to go through doing this every time I wanted pie there is no way the pie would happen every week. Gluten free pastry is a nightmare to roll out and I don’t need more stress or mess in my life. Besides I find this does the near enough thing and the process makes me feel like a kid playing with clay without flour everywhere. Simply line the pie or tart dish with baking paper, then place the mostly defrosted dough in the middle. Squish the dough down and massage it over the whole surface of the dish, distributing evenly over the bottom and the sides until you made an even thickness pie shell (feel free to use creative finger moves!) Next up add the filling and distribute evenly. Place maple syrup brushed sliced apples on top. Bake at 220ºC for 15 minutes in a pre heated oven, then decrease the oven temperature to 190ºC . Bake till the crust is golden and the filling is thick, 35-50 minutes depending on your oven. Sit the pie to cool completely to set the fruit filling, at least 2 hours, then cut into wedge slices and serve at room temperature with clotted cream or vanilla ice cream . The pie will keep a day in the oven or 3 days in the fridge and is wonderful with morning coffee...if it lasts till the morning!
Photography and food styling by Alice Wesley Smith